How to Send Your First Document with ThemiSign
Electronic signatures have moved from nice-to-have to essential for any team that deals with contracts, agreements, approvals, or forms. The process should feel straightforward, not overwhelming. ThemiSign makes it that way by combining reliable electronic signatures with smart workflow automation and templates.
This guide walks you through sending your very first document end to end. Whether you run a small business, manage HR paperwork, or handle client agreements, you’ll finish with a signed document, a complete audit trail, and confidence in the system.
Why Start with a Template Instead of a One-Off Upload
Many people begin by uploading a single PDF and adding fields on the fly. That works for truly unique documents. For almost everything else, templates deliver better results.
Templates let you define roles, required fields, and routing logic once. Then every future instance stays consistent. You avoid mistakes like forgetting a signature spot or sending the wrong version. ThemiSign’s template system shines here, especially when combined with its strong workflow automation.
Step 1: Register and Set Up Your Account
Head to ThemiSign and create a free account. The registration process asks for basic details — name, email, and password. Verify your email, and you’re in.
Once logged in, you land on a clean dashboard. Take a minute to explore the navigation. You’ll see sections for Documents, Templates, Workspaces, and Settings.
Step 2: Create Your First Workspace
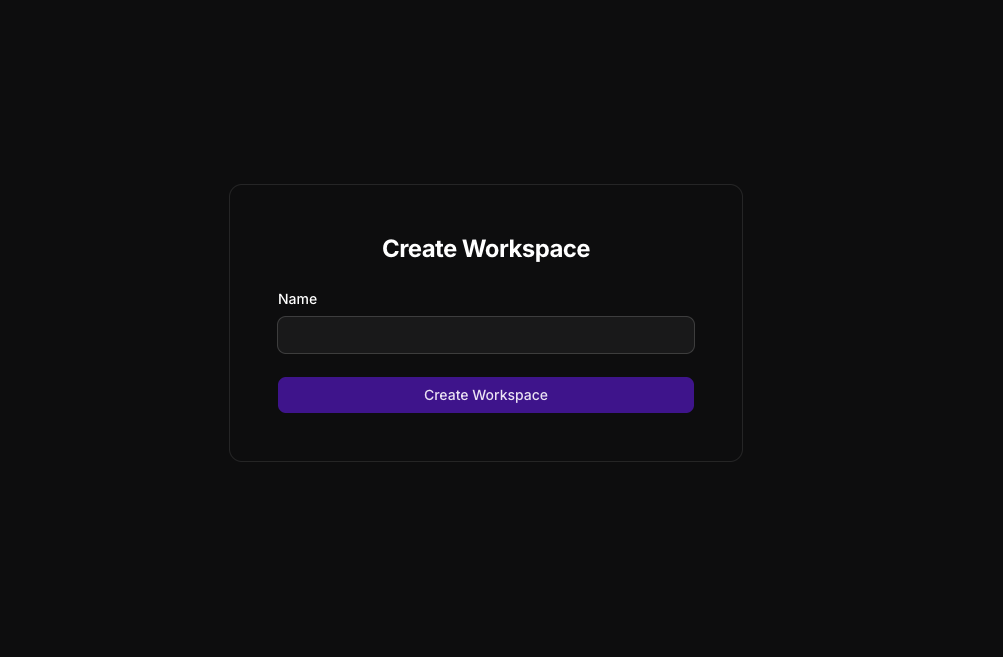
Workspaces act like dedicated folders for different teams, clients, or departments. They help keep things organized and control access.
Click into Workspaces and create one. Give it a clear name like “Client Contracts” or “HR Onboarding.” Invite team members if you need collaboration from the start. You can always adjust permissions later.
Many users skip this step and regret it when documents start piling up. A good workspace structure pays off quickly.
Step 3: Build Your First Template
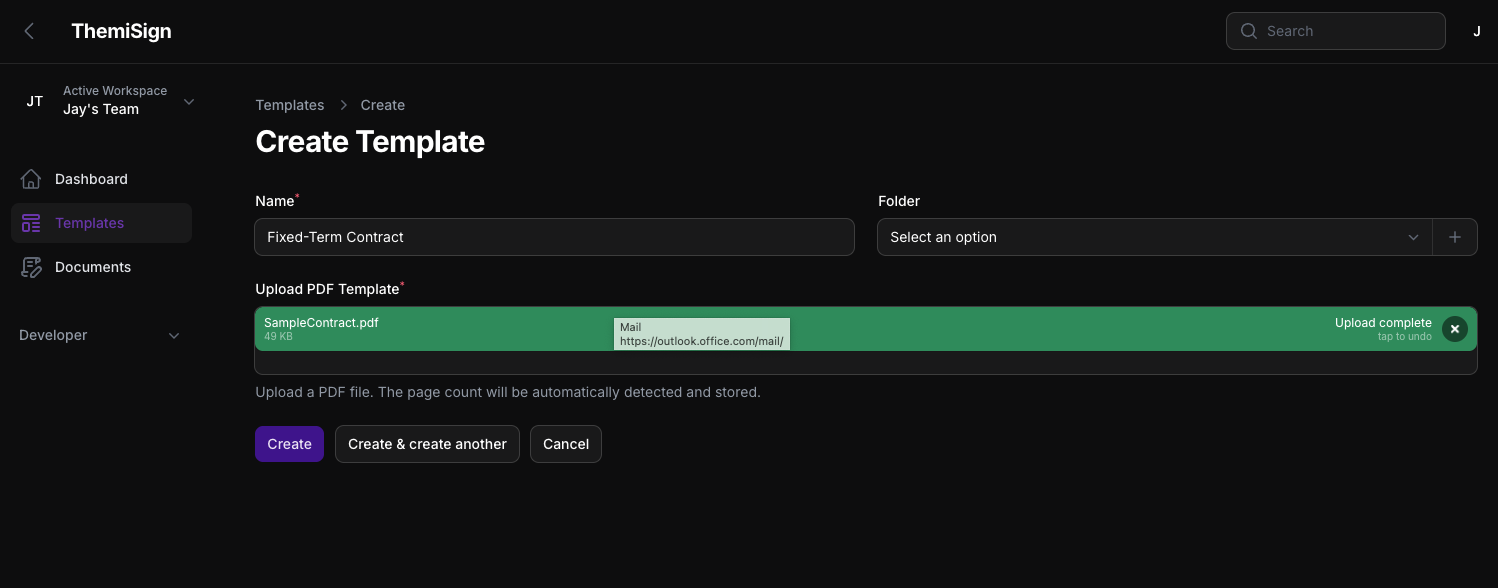
This is where the real power begins.
Go to Templates and start a new one. Upload your base document — usually a PDF, but ThemiSign also handles common formats well.
Name the template something descriptive. “NDA – Standard” or “Vendor Agreement v1” works better than generic titles.
Managing Roles and Recipients
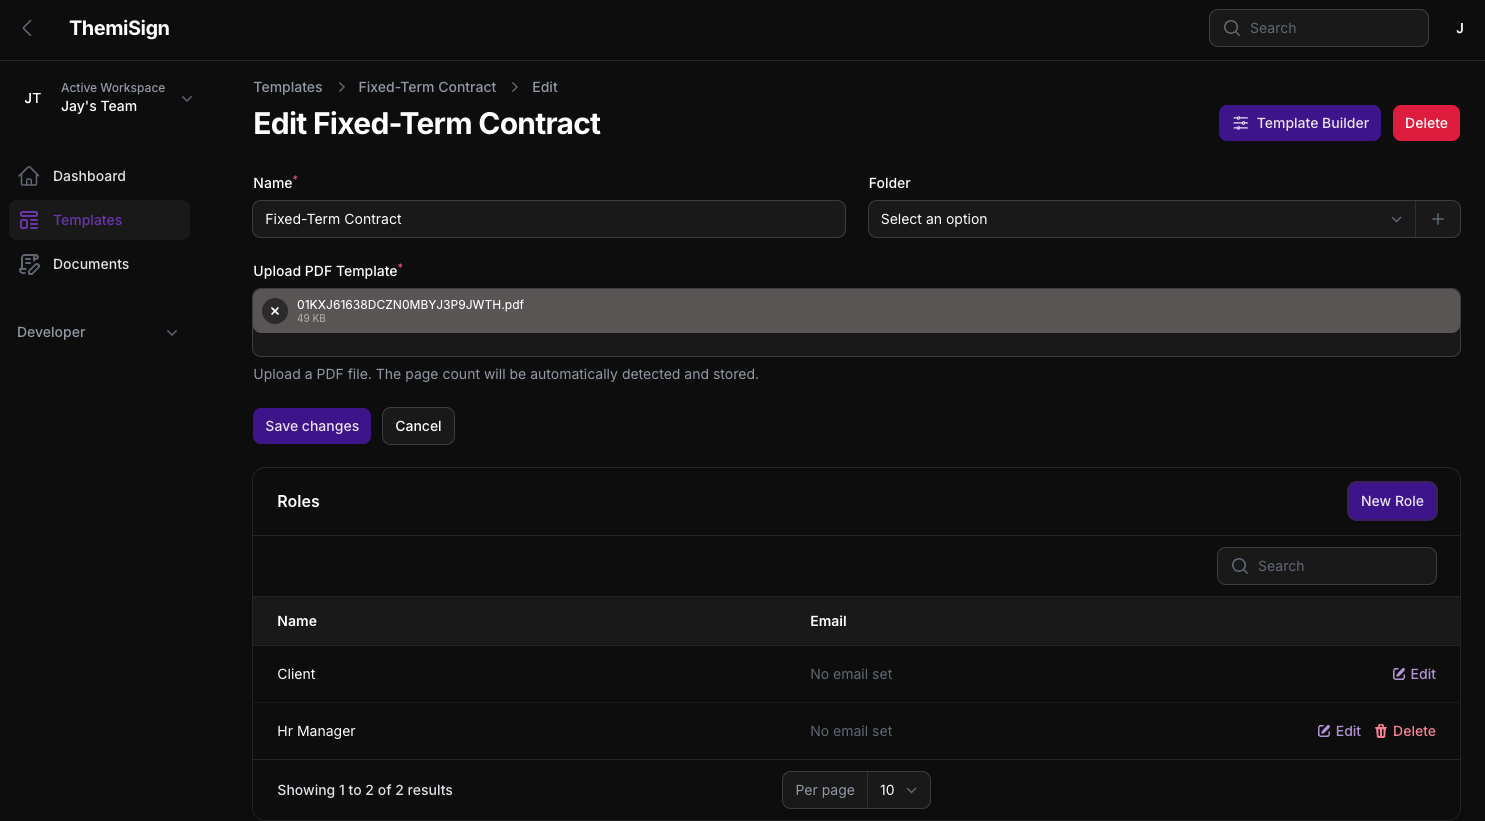
Define the participants early. ThemiSign lets you assign roles/signers.
You set the order here too. Some documents need sequential signing; others can go in parallel. ThemiSign’s workflow automation handles both smoothly.
Step 4: Add and Configure Fields
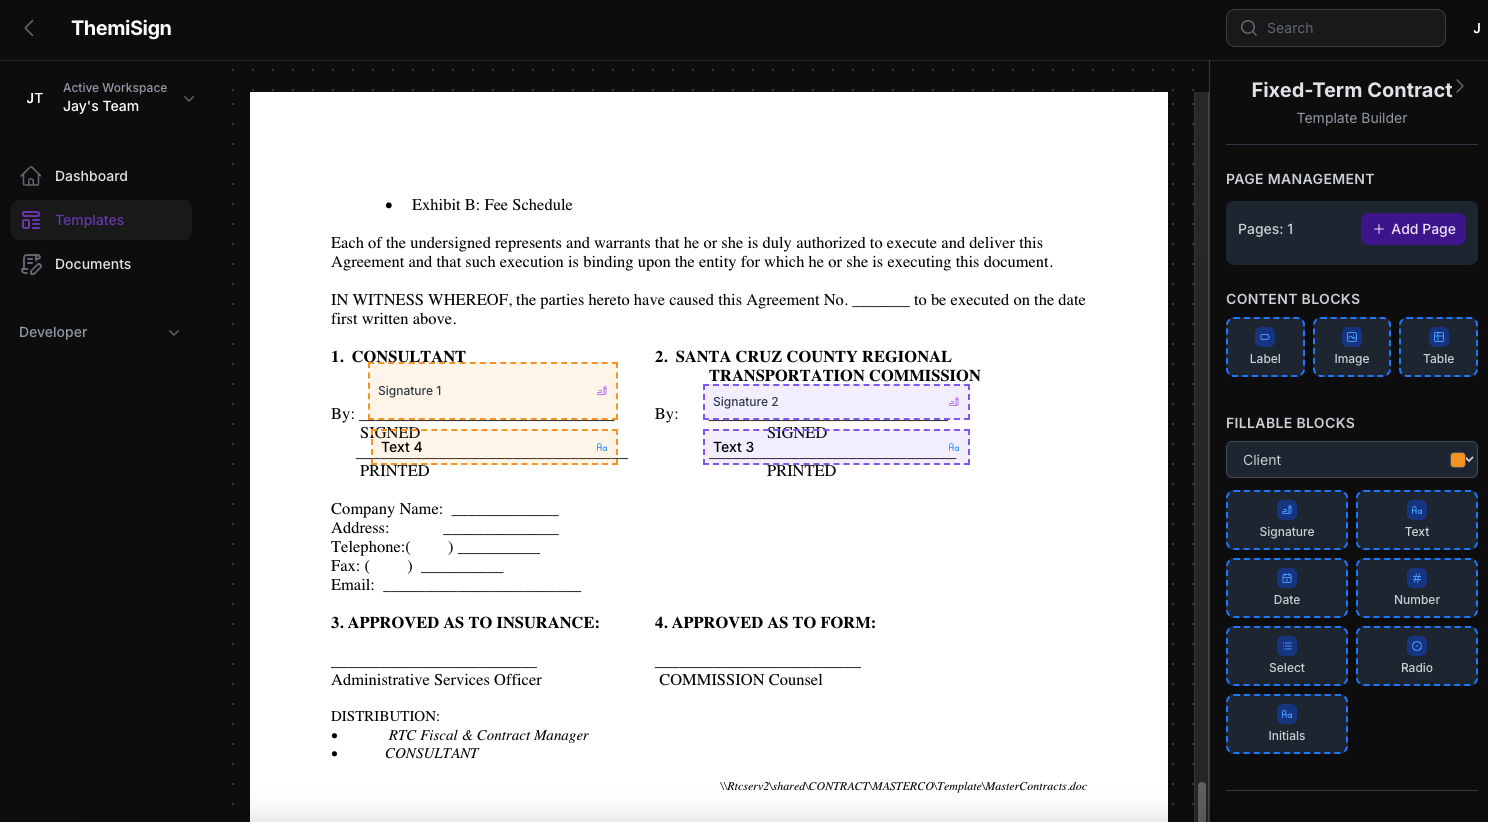
Now the template editor opens. This drag-and-drop interface lets you place fields exactly where they belong.
Common field types include:
Signature
Initials
Text input / free text
Date
Table
Dropdown
Drag a signature field to the right spot. Label it clearly — “Signature” or “Authorized Signatory.” Repeat for every required element.
Add labels or helper text next to fields. Something as simple as “Please sign here with your full legal name” reduces back-and-forth.
Step 5: Review, Test, and Save the Template
Preview the document from a signer’s perspective. Does everything flow logically? Are instructions clear?
Save the template. You can now reuse it indefinitely, updating the base document or fields as your agreements evolve.
Step 6: Send the Document
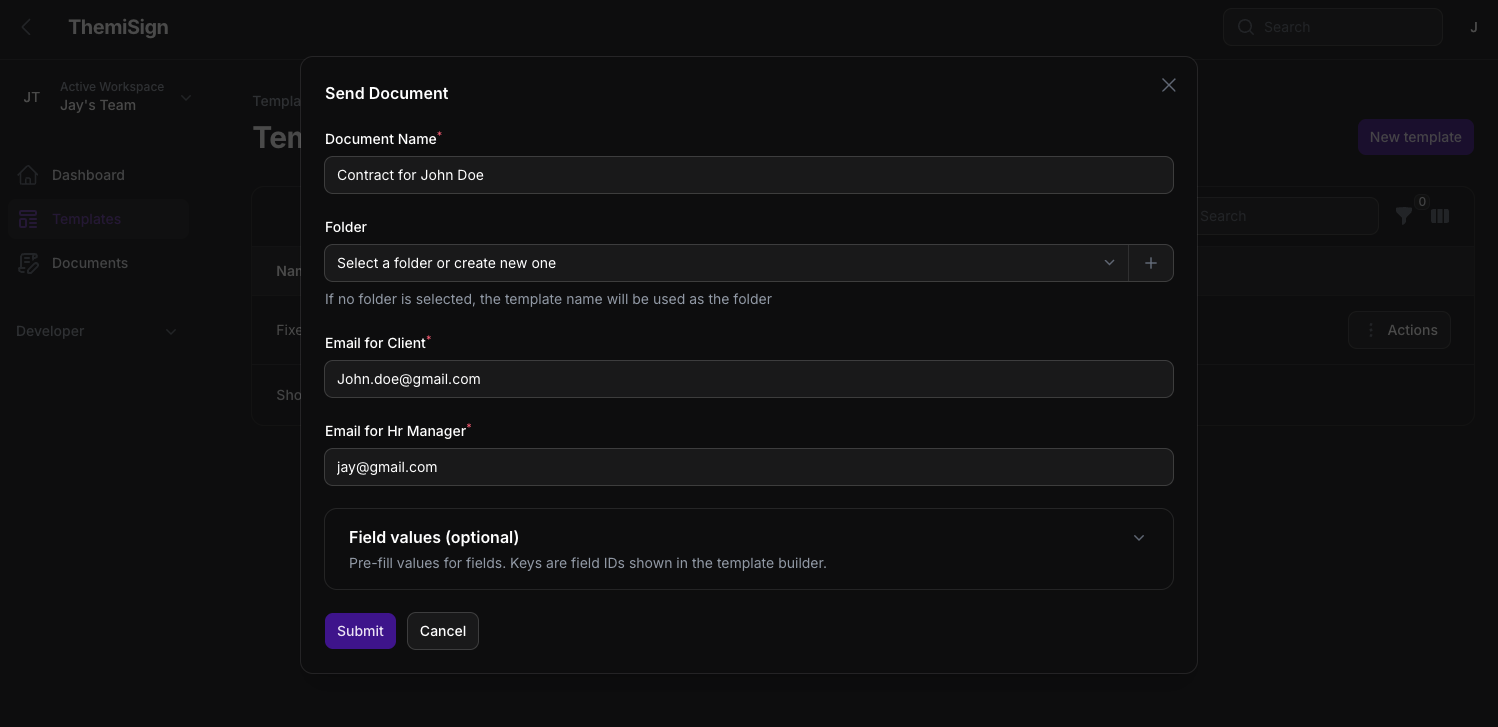
You have two main options: through the user interface or via API.
Sending via the UI (Recommended for First Time)
Go to templates.
Choose your preferred template.
Select “Send Document”
Add actual recipients and their emails.
Review the final document one last time.
Send.
Recipients get an email with a secure link. They can review, fill fields, and sign from any device without creating an account in many cases.
Sending via API (For Automation)
ThemiSign offers API access even on the Free plan — a big differentiator. Developers and teams integrating with CRMs, HRIS, or custom apps love this.
You can programmatically create envelopes, assign roles, populate fields with data from other systems, and track status. Check the documentation at /features/api for endpoints and examples.
Start simple. Most users perfect the UI process first, then explore API when volume increases.
What Happens After You Send
ThemiSign tracks everything. You see real-time status: Sent, Viewed, In Progress, Signed, Completed.
The audit trail captures timestamps, IP addresses, and actions. This record proves who did what and when — critical for compliance.
Once everyone signs, you and the recipients receive the finalized document with certificates attached.
Common Pitfalls and How to Avoid Them
Unclear field labels → Signers get stuck or skip required steps. Test every template.
Too many signers in one step → Parallel workflows speed things up when possible, but sequence them when order matters.
Forgetting mobile experience → Most people review on phones. ThemiSign’s interface works well across devices, but always test.
No follow-up → Set automatic reminders, but don’t overdo it. Two gentle nudges usually suffice.
Poor messaging → A vague subject line like “Document” gets ignored. Try “Please review and sign our partnership agreement by Friday.”